Update: this project was featured in issue 92 of the official Raspberry Pi magazine (download as PDF, buy the issue or subscribe).
SSH-ing into a remote solar powered Raspberry Pi at the top of an apple tree has a special feeling — almost like commanding a spaceship where any mistake can cost you a lost link.
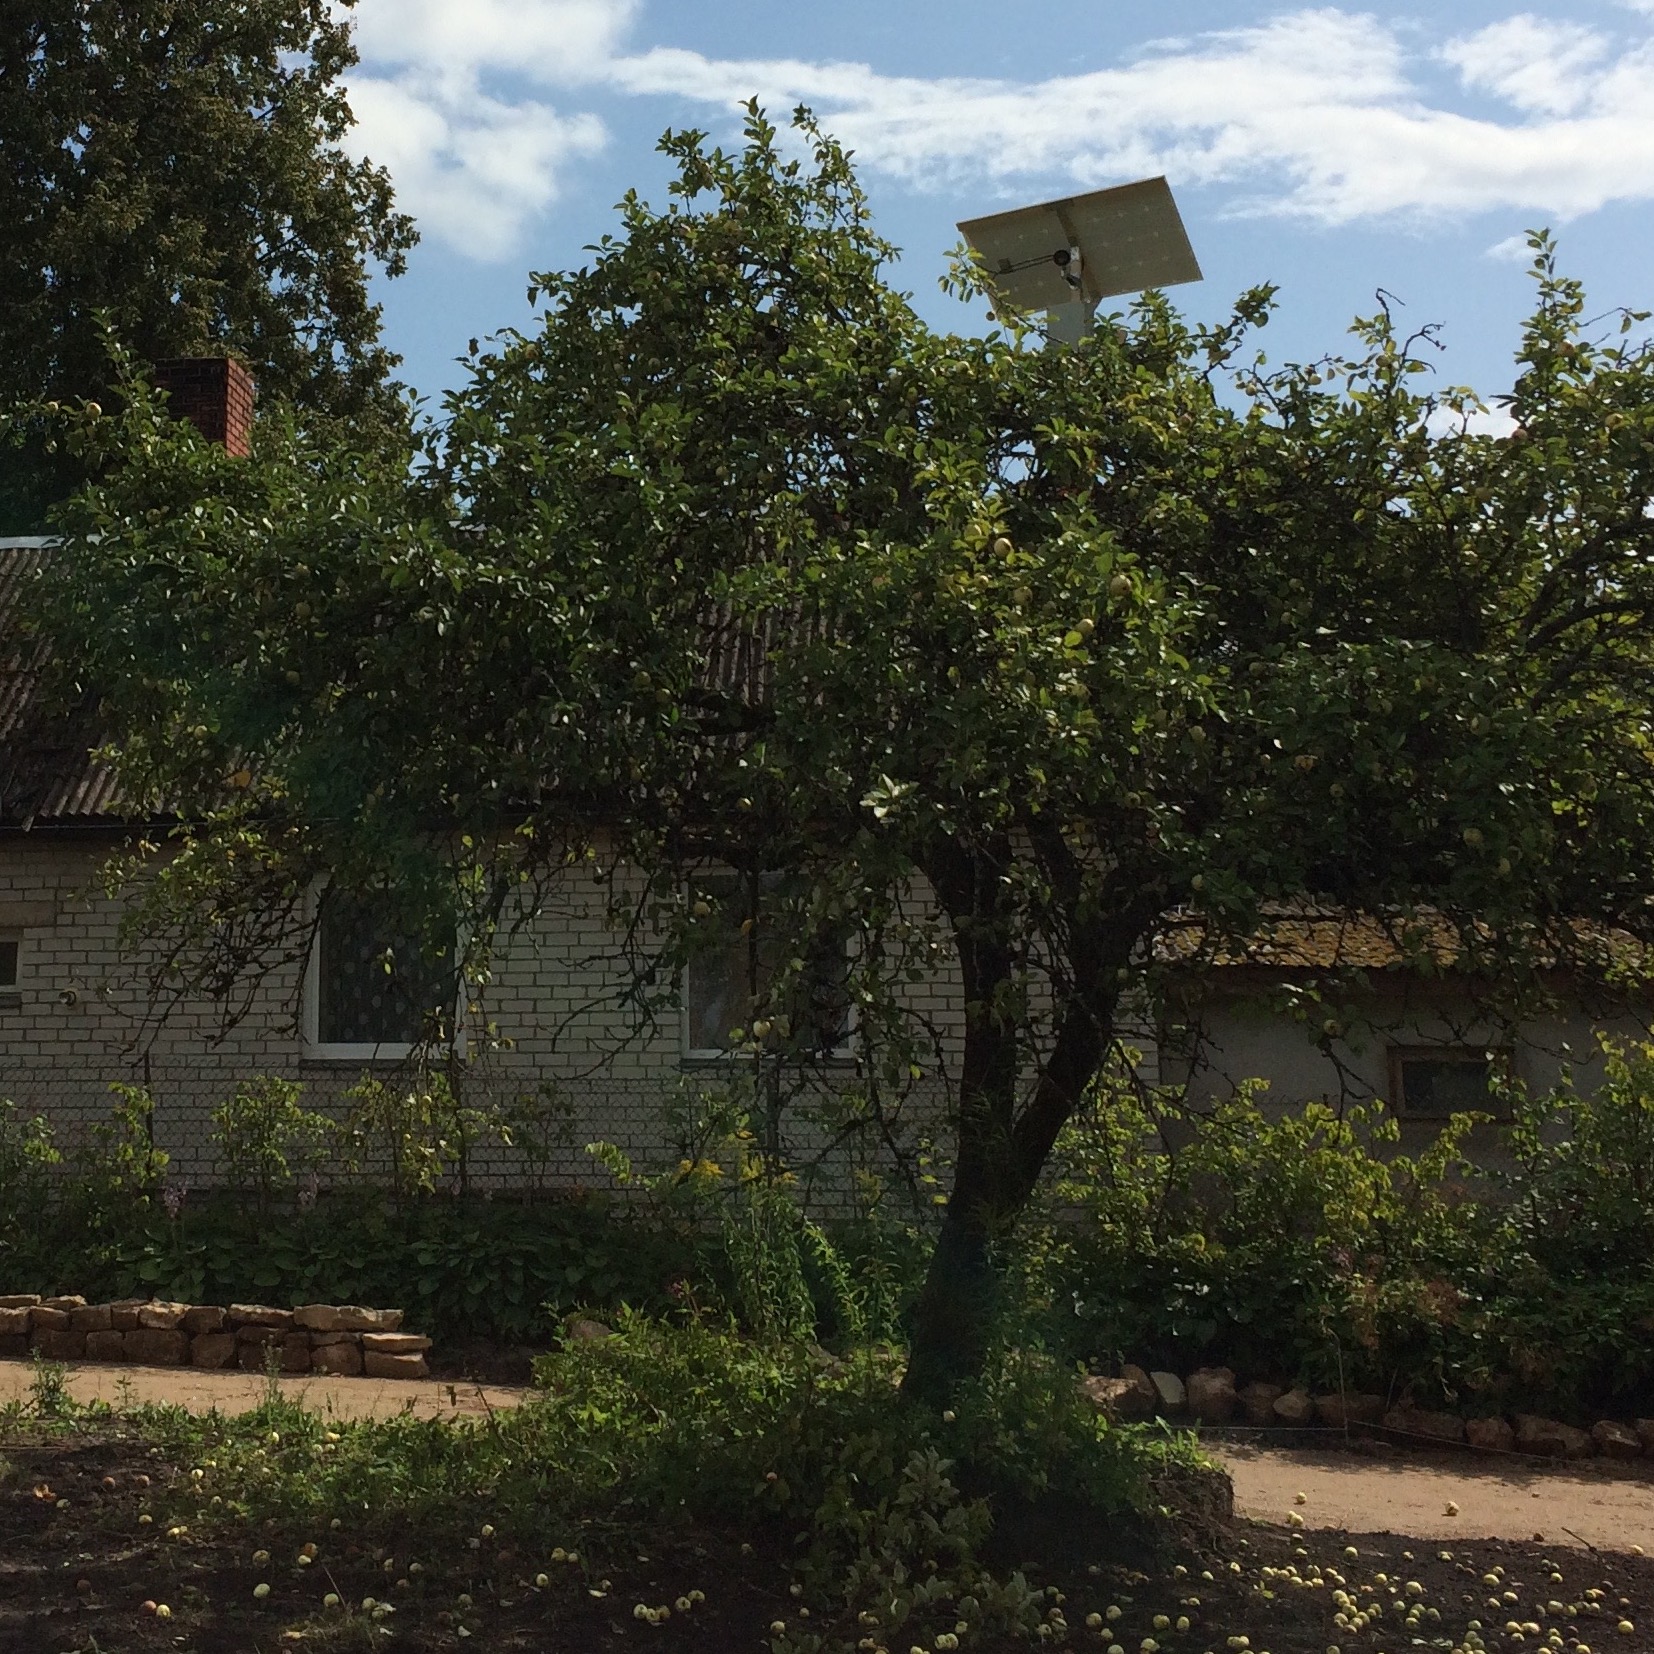
I build this project to remotely monitor our countryside house.
Internet Connectivity
There are two options:
- A mobile USB modem attached directly to the Raspberry Pi using the point-to-point (PPP) protocol, or
- A standalone mobile modem/router creating a WiFi network.
I decided to go with a standalone modem that is plugged in at my neighbours house because of complexities involved in creating a reliable PPP connection.
Components
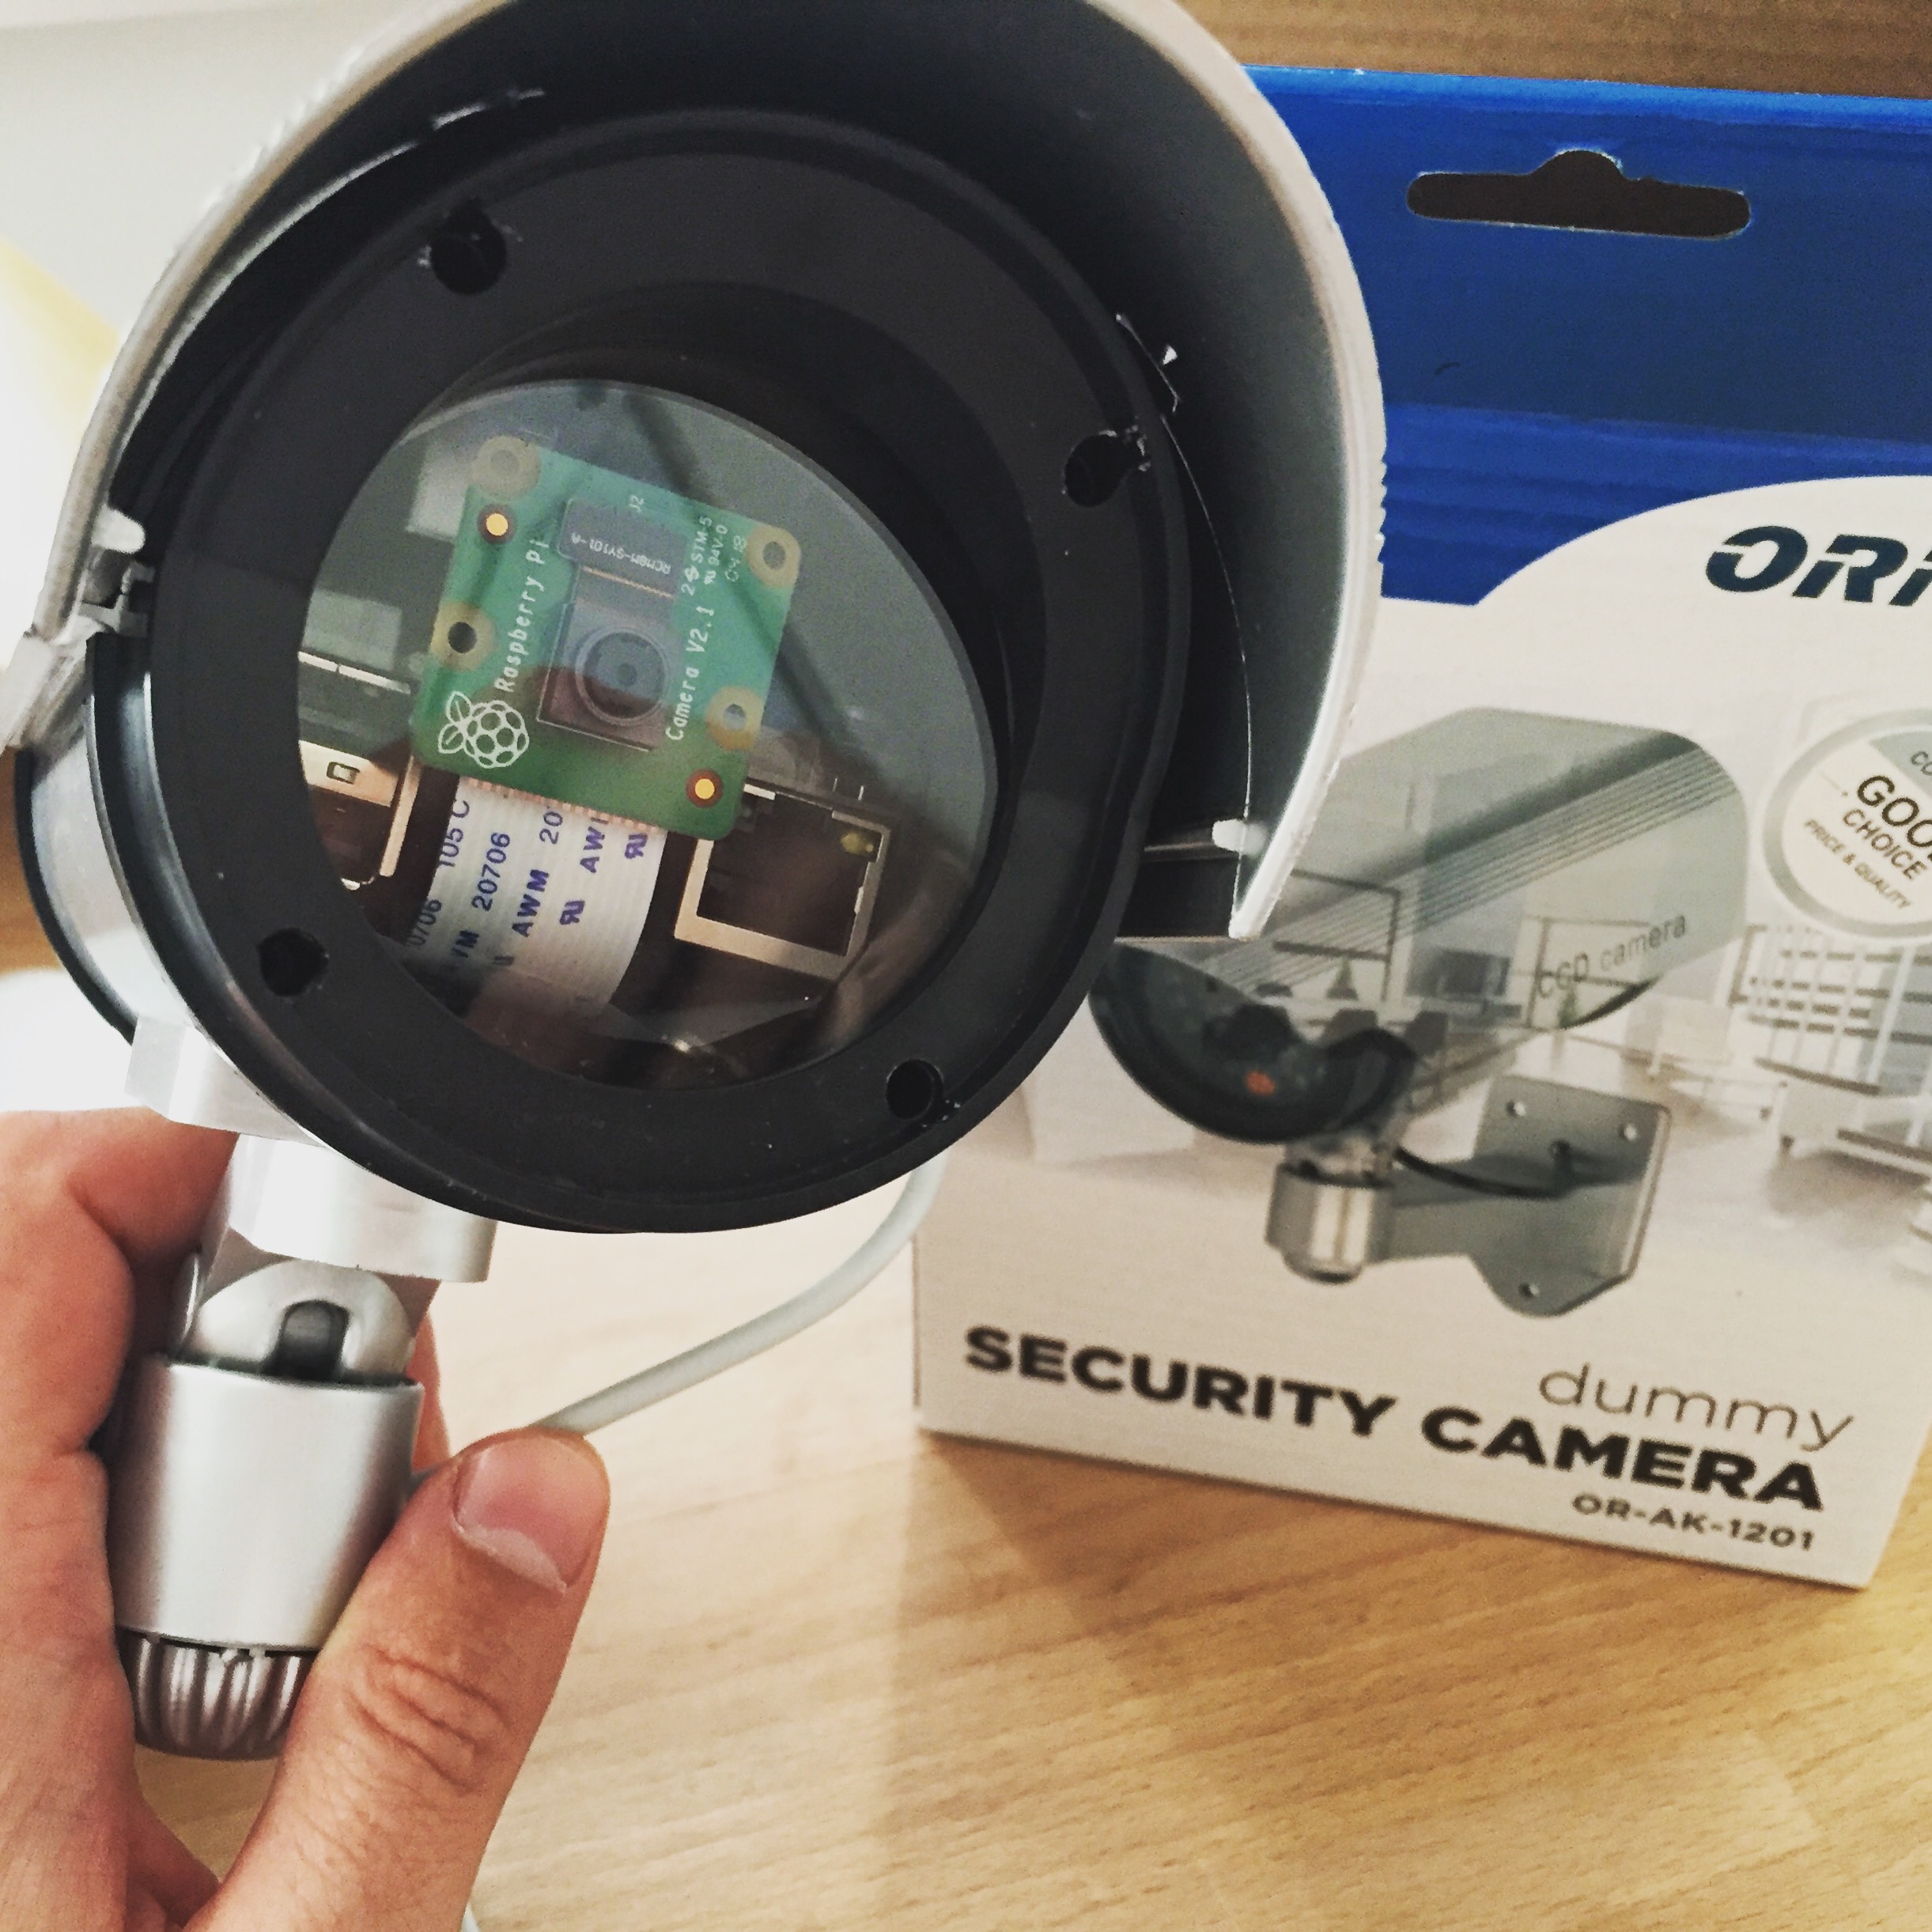
- $8 Raspberry Pi Zero W which supports the camera module.
- $29 Raspberry Pi Camera module (and a cable for Raspberry Pi Zero).
- $18 any 12V battery capable of delivering 1.5W x 24h = 36Wh, such as this 7Ah Pb battery (80Wh).
- $8 dummy security camera.
- $10 12V charge controller.
- $2 12V to 5V buck converter to power the Raspberry Pi.
- $15 cabling and connectors.
- $132 100Wp solar panel.
Total: $222 + $7 per month for a 10GB mobile data plan.
Notes
- Avoid blocking the
/dev/video0device when not used to allow other things such as timelapse scripts to capture photos or record videos. This is hard with things like the Motion daemon which constantly blocks the video device source. - Use the official
picameraPython library for accessing the camera and formatting the image and video to match the required output. - AutoSSH in combination with a custom systemd service is great for creating and maintaining a persistent SSH tunnel from Raspberry Pi to a remote server. Update: Use WireGuard for secure remote access.
- Rsync with hourly cron jobs is great for uploading and syncing photos and videos to a remote server for persistent storage. It also allows deleting older captures from Raspberry Pi while keeping them on the storage server.
Some of these scripts are available in this GitHub project repository.
Photos

Is there a solar controller b/w the battery and the solar panel? Also never seen the MikroTik before, will it reconnect if it happens to lose power? I want to do something similar with an RV.
Yes, I call it a charge controller — this simple and cheap PMW solar controller (no MPPT).
The mobile modem/router is actually connected to a permanent power supply at a nearby house so the Raspberry Pi connects to it over WiFi. I’ve seen Raspberry Pi change networks if one of them disconnects. However, it won’t do it if the WiFi network stays on and the modem connectivity drops, but that is usually handled by the modem as it will restart the connection.
What method are you powering the Pi off of the 12v battery?
Great question! I’ve updated the post to include information about these DC to DC buck converters I used for the project.
I love this kind of projects, thanks for sharing!
I built a similar project, although it’s not in a tree ;)
https://hackaday.io/project/28694-yet-another-raspberry-picam
Was looking for a solar solution… this might just to that!!! I want to make a weather station, but have it fully run on solar/battery.
Want to build a weather station (my first raspberry project also) and have it be on full solar/battery and wifi to network. How long could it run on that battery?
It really depends on the power consumption of the whole system. For example, a system using 2 watts on average (such as Raspberry Pi 3 with Wi-Fi connected) will need a 48Wh battery to last for 24 hours (24h x 2W = 48Wh) without any additional charging. A 48W solar panel would need just over an hour of full sun to recharge the battery completely. So I used a 80Wh battery and a 100W solar panel which has been sufficient to keep it running.
hi there thanks for sharing your project. I’m building a long term time lapse camera. so my question is are you able to power the pi constantly with this setup?
Unfortunately this setup turned out to be relatively unreliable specifically around the power consumption and the solar charging. I’m not sure if this was because of the higher energy requirements from the devices or the selected battery size, or the charge controller but the whole system would shut-off ~3 hours after the sunset. I plan to revisit this project after getting a new solar charge controller.
Hi,
great project.
What changes did you make to get your system running more than 3 hours from the battery. I’m planning on building this (probably with a MPPT controller).
Do you have any recommendations for a suitable MPPT controller.
thanks
A
I did pretty much all of the things listed in the guide — disable HDMI output, all LEDs and turn the camera on only when recording or taking the photo. It would still turn off early in the mornings before the sunrise for a few hours so it was definitely drawing a lot more power than was available.
I feel like any charging controller will do as long as it can charge up the battery quickly with the available sun hours. For example, with a 100Wp panel it would be sending 7A at a 14V charging voltage. The choice of your battery and solar panels impacts the charging current so it really depends on the setup.
One great feature is having a 5V USB output directly from controller since that can be used to power the Pi directly.