---
title: WireGuard on Raspberry Pi
date: 2020-06-30T09:49:35+00:00
modified: 2020-08-16T09:14:26+00:00
image:: https://kaspars.net/wp-content/uploads/2020/06/raspberry-pi-wireguard.png
permalink: https://kaspars.net/blog/wireguard-raspberry-pi
post_type: post
author:
name: Kaspars
avatar: https://reverse.kaspars.net/gravatar/avatar/92bfcd3a8c3a21a033a6484d32c25a40b113ec6891f674336081513d5c98ef76?s=96&d=mm&r=g
category:
- Home Automation
- Linux
post_tag:
- raspberrypi
- WireGuard
---
# WireGuard on Raspberry Pi
[WireGuard](https://www.wireguard.com/) is an awesome tool for securely accessing your Raspberry Pi computers even behind mobile networks that don’t provide a public IP address. It has [client applications](https://www.wireguard.com/install/) for iOS, macOS, Windows and all flavors of Linux.
I use WireGuard to access [Home Assistant](https://www.home-assistant.io/) and my [solar powered Raspberry Pi surveillance camera](https://kaspars.net/blog/solar-raspberry-pi-camera) from anywhere.
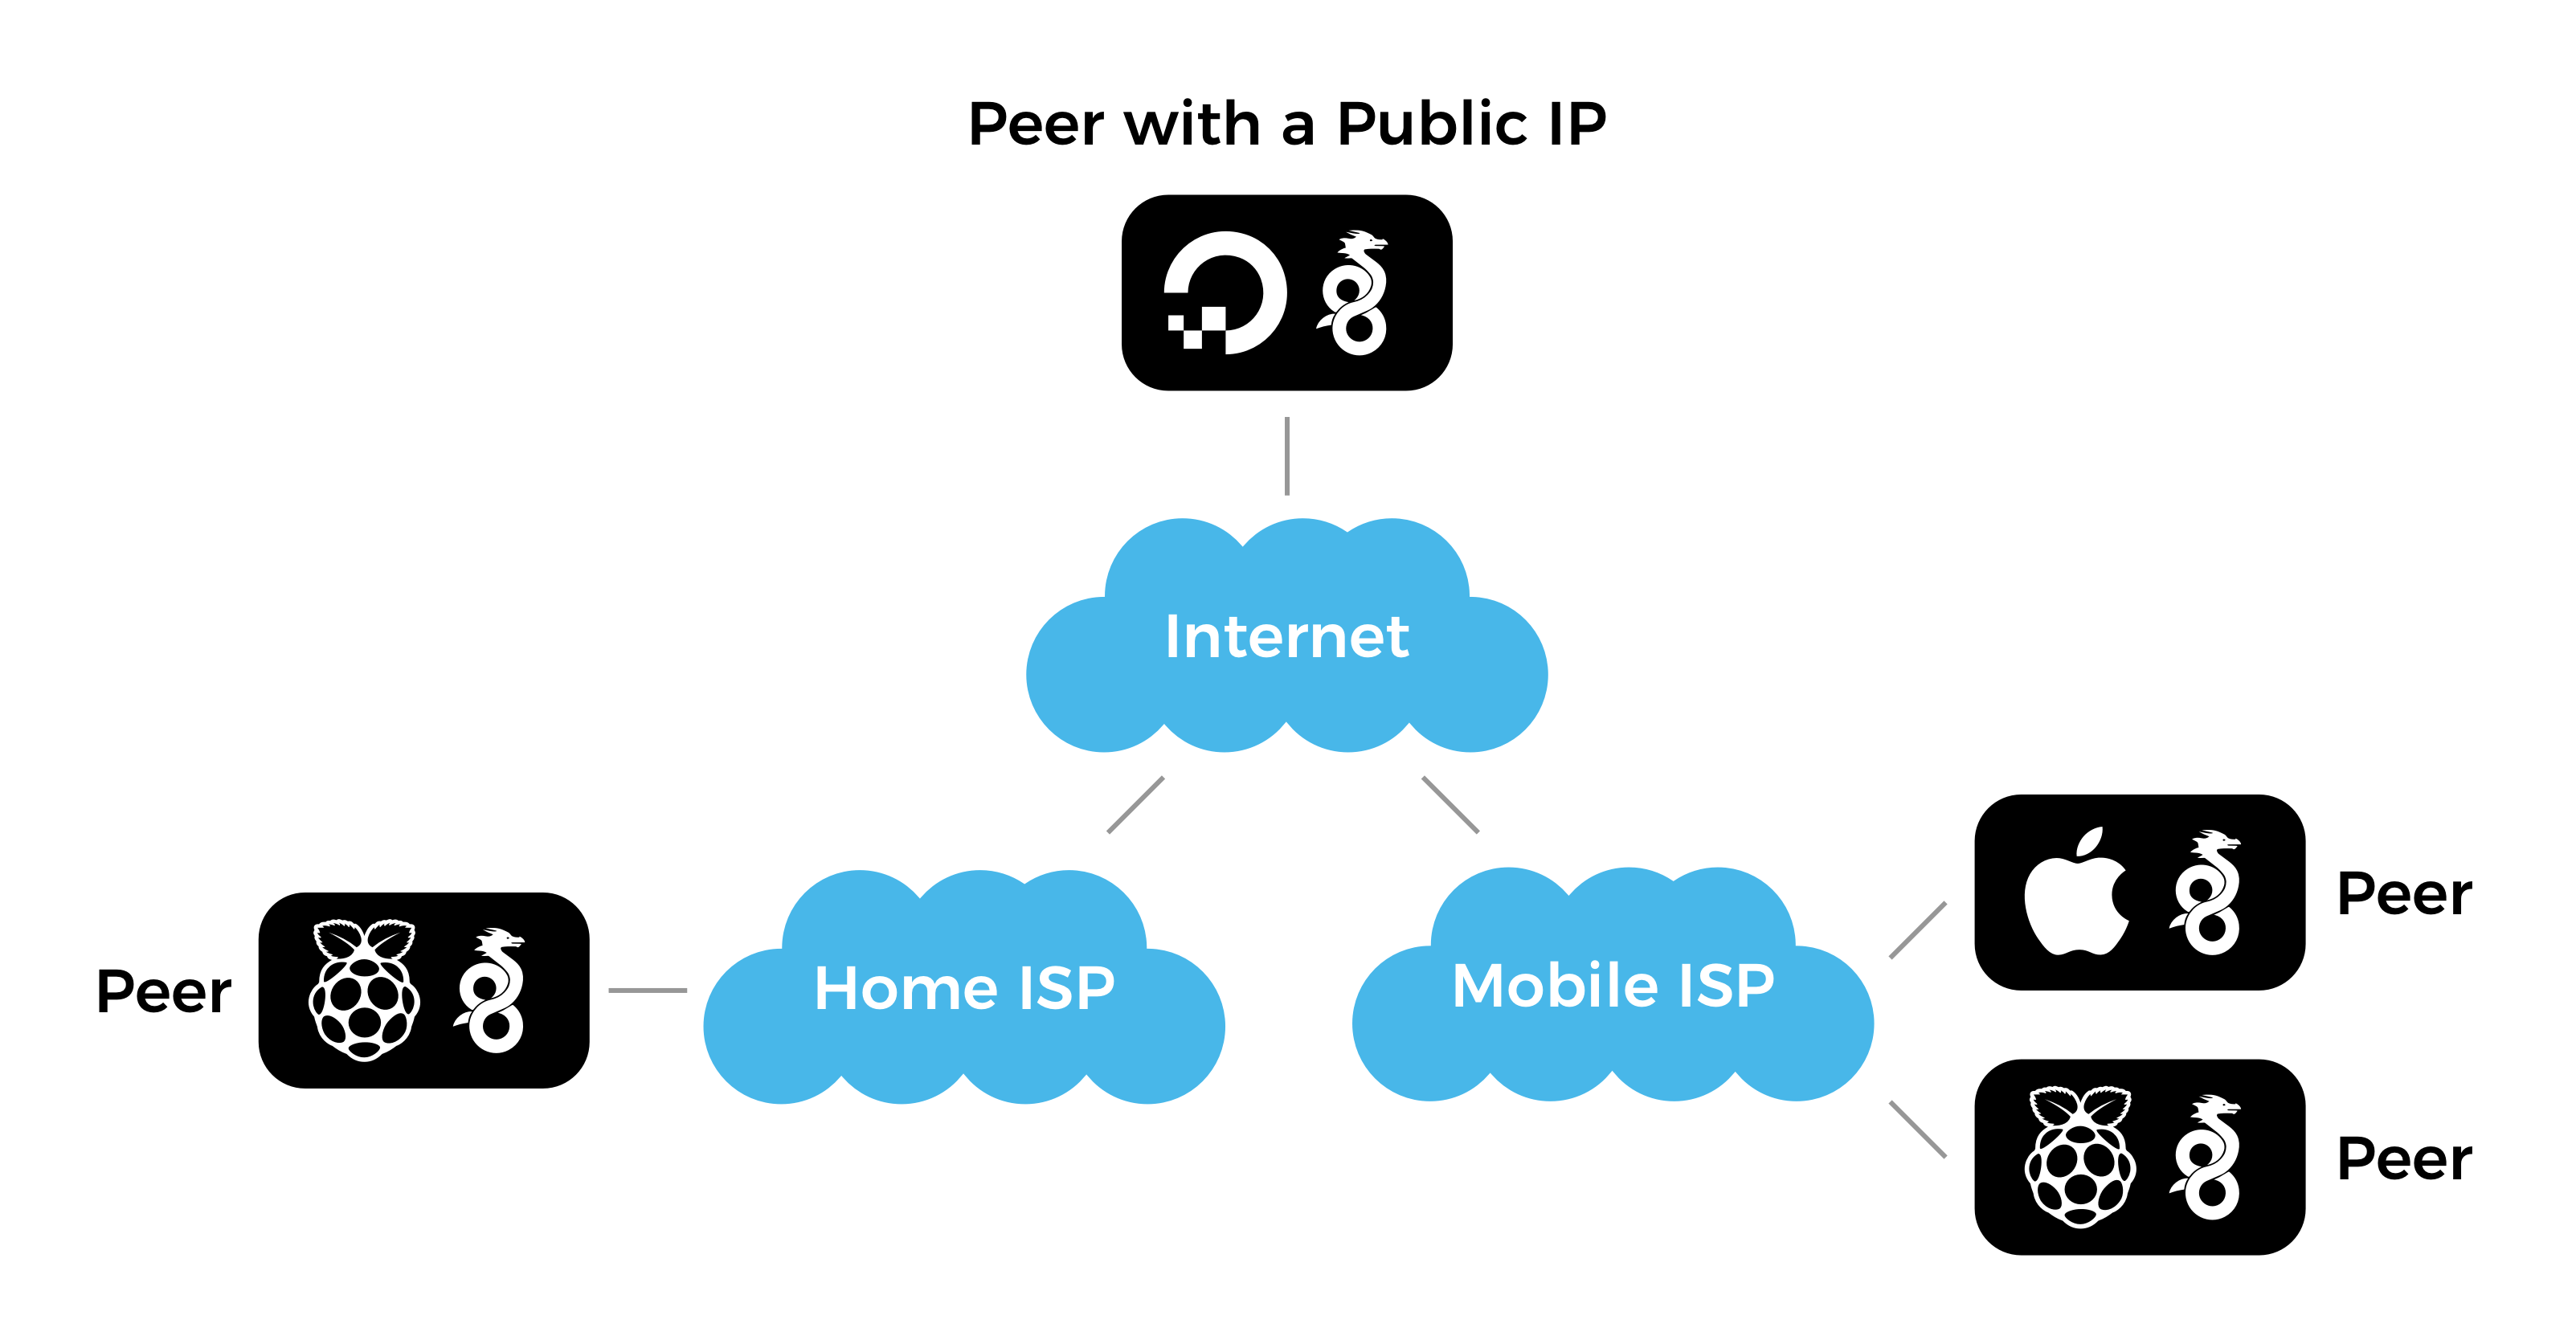Example of a WireGuard network with four peers and one public peer that serves as a bounce server.Devices connected to the same WireGuard network can access all other devices on the same network. You can safely view webcam feeds or internet connected device configuration pages without exposing them to the public web. WireGuard is awesome!
## Requirements and System Overview
WireGuard nodes require at least one publicly accessible node or peer which acts as a “bounce server” for all other nodes that are behind private networks that use NAT. The public node can be a Raspberry Pi connected to your home internet with a real (and potentially dynamic) IP address or the cheapest virtual private server on DigitalOcean with WireGuard installed and all peers listed in the network config file.
## Important WireGuard History
In March 2020 [WireGuard module was included in the Linux kernel version 5.6](https://arstechnica.com/gadgets/2020/03/wireguard-vpn-makes-it-to-1-0-0-and-into-the-next-linux-kernel/). Here are instructions for installing WireGuard while you’re running a Linux distribution that is based on an earlier version of Linux kernel.
Run `uname -a` to determine the current Linux kernel version. It should return something like this:
```
Linux raspi 4.19.118-v7+ #1311 SMP Mon Apr 27 14:21:24 BST 2020 armv7l GNU/Linux
```
where `4.19.118-v7+` is the version of the Linux kernel on your device.
## Install using Package Manager
WireGuard isn’t included [in the official Raspbian distribution](http://archive.raspberrypi.org/debian/pool/main/w/), yet. You can verify that by trying to install WireGuard from the package repository:
```
sudo apt-get install wireguard
```
If that fails, you need to install and compile it from the source files as described below. There are tutorials that suggest using packages from the Debian repository but I wouldn’t recommend that.
## Install from Source
[The official instructions for compiling WireGuard from source files](https://www.wireguard.com/compilation/) have been updated in early 2020 after the introduction of a separate package `wireguard-linux-compat` for the WireGuard Linux kernel module which has been decoupled from the user-space tools `wireguard-tools`.
We need to install the following two packages:
1. WireGuard kernel module *only* for systems with Linux kernel below version 5.6, and
2. WireGuard command-line tools for interacting with the application.
First, install the build process dependencies:
```
sudo apt-get install raspberrypi-kernel-headers libmnl-dev libelf-dev build-essential git
```
Clone and build the kernel module *only* if you’re running a Linux kernel version 3.10 to 5.5:
```
git clone https://git.zx2c4.com/wireguard-linux-compat
make -C wireguard-linux-compat/src -j$(nproc)
sudo make -C wireguard-linux-compat/src install
```
Clone and build the `wg` and `wg-quick` command-line tools:
```
git clone https://git.zx2c4.com/wireguard-tools/
make -C wireguard-tools/src -j$(nproc)
sudo make -C wireguard-tools/src install
```
That’s it! Now you need to configure the WireGuard to automatically start during the boot and which peers and servers to connect to.
## Configure WireGuard
See [this excellent and elaborate guide for configuring WireGuard](https://github.com/pirate/wireguard-docs) or follow the quick instructions below.
### 1. Generate the Authentication Keys
A pair of a private and a matching public key is used to communicate and authenticate the current instance of WireGuard with the rest of your WireGuard network. Use the `wg` utility to generate those keys.
First, set the file permissions mode for all following operations to 077 using `umask 077` which translates to “only allow the current user to read the created files”:
```
umask 077
```
Then generate the private key and store it in `privatekey` file in the current directory:
```
wg genkey > privatekey
```
The generate the matching public key to be referenced in all your WireGuard network peers from the `privatekey` that we generated previously:
```
wg pubkey > publickey < privatekey
```
The `>` and `<` operators are used to send the output from one command as an input for another command. In this case we’re sending the contents of `privatekey` into `wg pubkey` which then produces the `publickey` file in the current directory.
Use `cat privatekey` and `cat publickey` to output both keys to the terminal for reference.
### 2. Configure the WireGuard Network Interface
Your WireGuard installation can be associated with multiple WireGuard networks and each of them needs a dedicated network interface that is configured by adding `*.conf` files under the `/etc/wireguard` directory.
For example, we’ll add a network called `wg0` by creating `/etc/wireguard/wg0.conf` with the following contents:
```
[Interface]
Address = 10.200.200.X/32
PrivateKey =
[Peer]
PublicKey =
AllowedIPs = 10.200.200.0/24
Endpoint = :51820
PersistentKeepalive = 25
```
The `[Interface]` section is where we define this computer on the network:
- Replace `` with the contents of the `privatekey` we generated earlier. This string should never leave the device or be shared publicly. The contents of the `publickey` can be shared publicly and has to be known by all other peers that need to connect to your computer.
- Set the `Address` to an IP address to be associated with this device on your network. Notice the `/32` suffix [which provides some additional context for how the address is used](https://github.com/pirate/wireguard-docs/tree/51a1021dc4fa1fee6eb710cd663b8b540c8f8feb#cidr-notation).
In the `[Peer]` section we define other WireGuard nodes or servers that we want to connect to:
- `PublicKey` is the public key of the server we’re connecting to (not the one we generated above).
- `Endpoint` is the public hostname (if the peer is able to resolve the IP address) or the public IP address of the server.
See [this WireGuard configuration reference](https://github.com/pirate/wireguard-docs/tree/51a1021dc4fa1fee6eb710cd663b8b540c8f8feb#config-reference) for the explanation of all configuration parameters.
We can also use the `wg` command line tool to generate the same file:
```
sudo wg set wg0 \
private-key \
peer \
endpoint :51820 \
allowed-ips 10.200.200.0/24
persistent-keepalive 25
```
### 3. Enable the WireGuard Interface
Enable the `wg0` interface we configured:
```
sudo wg-quick up wg0
```
Use `wg-quick down wg0` to stop the interface.
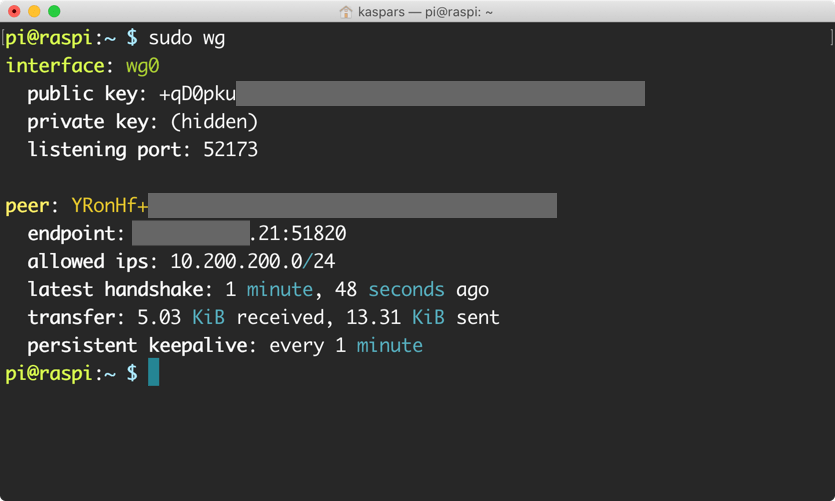Output of the `wg` command on Raspberry Pi showing that it’s connected to a WireGuard server which is just a regular WireGuard peer.### 4. Start WireGuard on Boot
Register a script that came with the WireGuard utilities to start the WireGuard service automatically using Systemd during boot:
```
sudo systemctl enable wg-quick@wg0
```
where `wg0` is the name of the interface to start during the boot.
To start the service right away:
```
sudo systemctl start wg-quick@wg0
```
To see the current status of the service:
```
sudo systemctl status wg-quick@wg0
```
### 5. Debug WireGuard
Use the following commands to debug the WireGuard connection:
- `sudo wg show` to monitor the connections.
- `journalctl --follow wg-quick@wg0` to monitor the WireGuard startup.